Vue JavaScript Library First Step
This is the second part of the three-part series on JavaScript. In the first part, Google Charts for Graphs, we discussed a bit about HTML and using the Google Charts JavaScript to make client-side charts. Instead of downloading potentially big, static graphs from the server, the client can now render the graphs locally. The graphs themselves offer a bit of interactivity, for example, we can hover over a part of the pie chart and the value will pop up. This is all done without us needing to do anything besides supplying the graph value in the HTML code.
In this post, we will add some simple interactions using the Vue JavaScript library. For simple interactions, I would have previously used JavaScript libraries such as jQuery. We can still do that, but jQuery has a lower ceiling than full-featured frontend libraries such as Vue or React. One important thing I look for when learning something new is the mantra of 'learn-once, use many times', and Vue passes that test. Let's see how it works.
Single HTML Code File
I am going to do something a bit different this time. I am going to list out the final code first and the result first, then come back to the explanation. As you can see, this is just one single HTML page and pretty straight forward.
This is the code:
<!DOCTYPE html>
<html lang="en">

<head>
..<meta charset="UTF-8">
..<meta name="viewport" content="width=device-width,initial-scale=1.0">
..<title>Hello Vue!</title>
</head>

<body>

<div id="app">
..<h2>[[ title ]]</h2>
..<button type="button" v-on:click="greet">Say Hello!</button>
</div>

<script src="https://cdn.jsdelivr.net/npm/vue/dist/vue.js"></script>
<!-- Vue Script -->
<script>
var app = new Vue({
..delimiters: ['[[', ']]'],
..el: '#app',
..data: {
....title: 'Hello Vue World',
..},
..methods: {
....greet: function (name) {
......alert('Hello World, it works!');
..},
.},
});
</script>
</body>

</html>
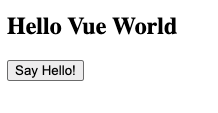
When the page is rendered, we will see a no-frill page:

And if we press the bottom, we will see the alert box:

This might not seem much, but it means the variable value has been substituted and the function can be called. Let's break down the sections.
A bit of Explanation
As we can see, the HTML page is broken down into the HEAD and BODY sections with the HEAD section containing metadata such as title and character encoding. Many times we see the JavaScript library and CSS file loaded in the HEAD section as well. But in this case, we will load it in the BODY section.
The BODY section is really two parts as well. The first part is the <div></div> with <h2> and <button> inside. This element is also given the id of 'app'. The id attribute should be unique in the whole HTML page (as opposed to a class that can appear multiple times), so it would guarantee this is a unique element, we will later use this to look for where to trigger the load of Vue script. The 'el' part specifies which element to look for and the 'delimiters' indicates which symbol to use when we need to substitute the variable value in HTML instead of displaying text. By default, Vue uses the double mustache '{{ <variable name> }}' as a delimiter; however, that conflicts with Jinja2 delimiter so it has become a bit of a habit for me to change the delimiter of simple Vue scripts.
Inside of the Vue script, we have a data section and a methods section. In data, we have a variable with the name of 'title' and the value of 'hello world'. In methods, we included the 'alert' function that the browser understands. Going back to the HTML:
<div id="app">
..<h2>[[ title ]]</h2>
..<button type="button" v-on:click="greet">Say Hello!</button>
</div>
We can see that h2 title value should now be substituted with whatever is in the title variable. For the button element, we have a special attribute called 'v-on'. This is called a directive in Vue and where the magic is. In this case, the v-on listens for the click action and bind that with the Vue method called 'greet'.
This might not seem much, but with variable substitution and Vue directives, we can already do a lot of what we need that adds interactivities for HTML pages. This gets better as we can build on this knowledge when we need to expand beyond simple scripts into a whole frontend application based on the Vue library.
In the next post, we will see how we can tie Vue in with Google Charts. See you there.
Happy Coding!
Eric